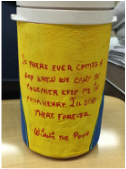
“You never really understand a person until you consider things from his point of view... Until you climb inside of his skin and walk around in it.”
― Harper Lee, To Kill A Mockingbird
― Harper Lee, To Kill A Mockingbird
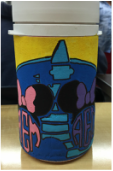
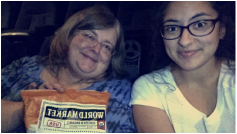 It's Whatever Wednesday!! What does that mean? That today's topic could be anything! It could be about politics, education, life, a good story, or even crafts. Whatever Wednesday means we just don't care. For example in our photo we broke the rules and brought outside popcorn when we to saw a movie earlier in the year. Oooh...we are such rebels!!! So what's today's topic? Staying hydrated for Disney but being cute while doing so. Now what does that mean? We're going to transform a drab one-liter cooler into a fab one-liter cooler! Are you ready for this? It's transformation Wednesday! Mom maybe we should have done this on Tuesday. There is this thing called Transformation Tuesday. It even has its own hashtag! Well little girl we're doing our own thing! Okie dokie. I can live with that. Beautifying a Cooler
So what's needed for this project? - 1 liter cooler - sander/ sand paper - plastic primer (I prefer Krylon Fusion for Plastic) - tissue paper - spackling - painter tape or masking tape - lots of paint and paint brushes - sealer (I use Modge Podge but you can use any type of sealer.) Step 1: Obviously you need to find a cooler. I got mine in a set of three at Wal-Mart for $25. I had to make my boyfriend a cooler for his fraternity earlier. Step 2: Some coolers may have an indent or logo on it. You can choose to keep those or you can apply spackling to the indents. Allow the spackling to dry at least eighteen hours.
Step 3: As your spackling is drying, come up with the design that you would like to put on your cooler. Draw what needs to be drawn or trace what needs to be drawn. If you found something you would like to trace, I found that tissue paper is the best tracing paper. I normally draw out the design that I want and then I trace it. 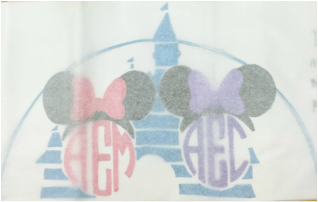 Step 4: Sand your cooler until there's no finish left on it. Sand all areas that you plan to decorate. The reason you want to sand your cooler is because you want to rough it up to allow the paint to stick better. Don't forget to sand the spackled area. You want everything to be nice and smooth. Step 5: Prime your cooler. Allow each layer to dry before adding the next. This is important. My favorite brand is Krylon. 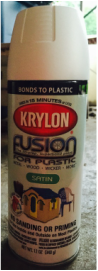 Step 6: Beautify that cooler like there's no tomorrow! Trace your designs or freehand your way to success! Step 7: Once you have beautified that cooler seal it up so it doesn't scratch. I use Modge Podge but there are many different types of sealant. 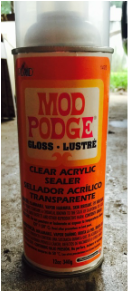 Step 8: Enjoy your newly designed cooler! Stay hydrated and have fun! And that ladies and gentlemen is how you beautify a cooler and stay hydrated at Disney. This took about three days from start to finish. Remember it's not about how long it takes you to make it but the fun you're having. Look for our cooler in an upcoming post about how to Disney the right way! We hope you enjoyed this little tutorial! Send us your photos when you get done and we'll post them here so everyone else can get ideas! Here's the cooler I had to make my boyfriend for his formal for his fraternity. And yes that is the Dr. Pepper logo and a Whataburger combo. So really you could beautify any cooler you have at home!  XOXO,
The Gearles
1 Comment
|

Abby & AndreaA college student trying to figure out the world with her mom by herside. Life through my lens (Abby). We all have different stories and these are only some of mine. Some funny, some adventurous, some hard. Sit back and relax. Enjoy. Archives
March 2018
Categories
All
|


 RSS Feed
