“You never really understand a person until you consider things from his point of view... Until you climb inside of his skin and walk around in it.”
― Harper Lee, To Kill A Mockingbird
― Harper Lee, To Kill A Mockingbird
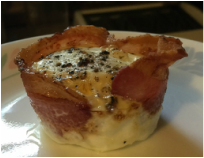
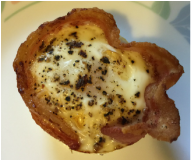
 Wakey wakey eggs and baky! Has your mom ever told you that? I don't recall my mom ever doing that. Mother have you ever told me that? Not that I recall. So it's Friday...you know what that means!! A new recipe. This one is by far one of my favorites. As many of y'all know, Abby and I have been driving back and forth between Jacksonville and Palestine for the past five years. Well that's a thirty minute drive and cereal was not cutting it. When we began eating eggs and bacon for breakfast, scrambled eggs, fried eggs, and over easy got boring so we needed something new. What did we come up with?? Bacon egg cups! And that's what we're bringing you today! Ingredients This recipe will make from 1 to 12 bacon egg cups. -bacon (one piece for each bacon egg cup) -eggs (one for each bacon egg cup) -salt and pepper 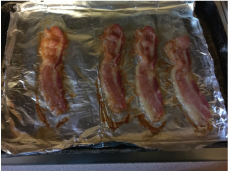 Step 1: Cook the bacon until it is about half done. We just put it on a foil lined baking sheet and put it in a 375 degree oven for about 10 minutes. 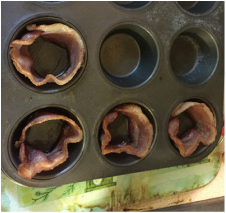 Step 2: Spray however many cups you need in a muffin tin with cooking spray (ex. Pam). When the bacon is cool enough to handle, line each muffin cup with a strip of bacon as shown above. 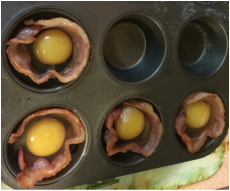 Step 3: Carefully crack an egg in each muffin cup. 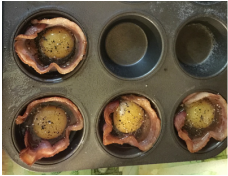 Step 4: Sprinkle each egg with salt and pepper. 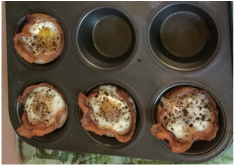 Step 5: Bake in a 375 degree oven for about 15 minutes, depending on how cooked you want your egg to be.
Step 6: Enjoy!! That's all there is to it!! An easy on the go breakfast!!
And that friends and family is one of our favorite breakfasts. It doesn't take long and it only has 5 steps!!! That's awesome!! We hope you enjoy this as much as we do! Come back next week for more! XOXO, The Gearles
0 Comments
We're back in the kitchen!! This is my favorite place to be. With today's recipe comes a fun fact...my mom's favorite type of food is...can anyone guess!?!? It's Mexican!! And to be more specific...her favorite food is...can you guess...it's...NACHOS!! Now this recipe takes all of about thirty minutes! This includes prep and cooking time. So let's get down and dirty in nacholand!
So what do you need for these delicious nachos?
Servings- 4 Total time- 30 minutes Ingredients: - bag of tortilla chips - 15.5 oz. can of black beans - 15.5 oz. can of corn - 10 oz. can of diced Rotel tomatoes - 2 c. bag of cheese (your favorite kind we choose Mexican style) - a bag of grilled chicken strips - sour cream - guacamole - jalapeños - cilantro (your personal preference on how much you would like to add) - anything else you want to throw on your nachos! 
Step 1 - Preheat oven to 375 degrees
Step 2 - Cover a cookie tray with foil and spread your chips all over. For some pizzazz add lemon or lime juice over them. 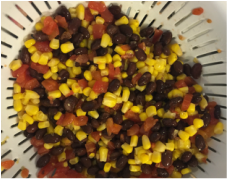
Step 3 - Mix your beans, corn, cilantro and tomatoes in a collander.
Step 4 - Warm your grilled chicken strips in the microwave for 2-3 minutes or until thawed out. Take them out of microwave and cut into bite size pieces. 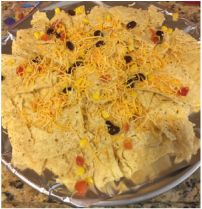
Step 5 - Sprinkle a layer of the bean, corn, and tomato concoction over the chips and follow with a layer of cheese. Repeat with another layer of bean, corn, and tomato concoction followed by another layer of cheese.

Step 6 - Add your chicken bites over the nachos.
Step 7 - Add a last layer of cheese. Step 8 - Cook in over for 10-15 minutes or until cheese is melted. Step 9 - Top with your choice of toppings. We love guacamole, sour cream, onions, and jalapeños! And we're terribly sorry but we forgot to take a picture of our masterpiece. They came out of the oven and we just dug right in!! There's was no time to take a photo or update social media about them.
And friends that's how you make some tasty and maybe not too unhealthy nachos!! Keep following us to find out what other fun recipes we share with y'all!!
XOXO, The Gearles
Hey y'all! Do you remember us? We remember y'all. Sorry it's been such a long time since we posted but you know when you go to Disney you're just so tired when you come back to the room. Or in Abby's case she has to text or FaceTime or Skype her little boyfriend until she falls asleep. Any who mother they don't need to know that. So what have we brought for you to try and make today?? IT'S A MEXICALI MEAT PIE!!! By golly the best thing I've ever made that's not a sweet.
This recipe comes from an old Pillsbury bake off magazine that my mom bought sometime during the sixties. She would make this for us to eat quite often . She also took it to our church's annual homecoming and it became a hit there too! I hope you enjoy it as much as we have over the years! Mexicali Meat Pie
Servings: 8
Time: 1 hr 25 min. Ingredients For Pie Crust: 1 c. flour 2 tbs. cornmeal 1/2 c. bacon drippings or shortening 3-4 tbs. ice water Ingredients For Filling: 6 slices of bacon 1 lb ground beef 1 (8 oz) can of whole kernel corn, drained 1/2 c finely chopped green bell peppers or red bell pepper 1/2 c finely chopped onion 1/4 c cornmeal 1/2 tsp. oregano 1/2 tsp. chili powder 1 tsp. salt 1/2 tsp. pepper 1 (8oz) can tomato sauce 1 egg 1/4 c milk 1/2 tsp. dry mustard 1/2 tsp. Worcestershire sauce 1 1/2 c shredded cheddar cheese 8 stuffed green olives, sliced As usual we were lazy and just used a store bought Pillsbury pie crust but we will give the pie crust recipe for all you youngin's out there who want to be brave and take the time to make one. Pie Crust Directions: 1. Combine flour and cornmeal. 2. Cut in bacon drippings or shortening until the mixture is the size of small peas. 3. Add the ice water a little at a time while stirring with a fork until the dough holds together. 4. Roll out on a floured surface and place in a 9 inch pie plate. 5. Flute the edge. Directions 1. Preheat oven to 425 degrees. 
2. Fry bacon until crisp and then break into little pieces.
3. Put 1/2 cup of bacon drippings in freezer and chill until firm. 
4. Brown the ground beef in a large skillet until it's brown. Drain off any grease.

5. Add corn, bell pepper, onion, cornmeal, oregano, chili powder, 1/2 tsp salt, pepper, and the tomato sauce.
6. Allow meat mixture to cool and prepare the pie crust. 
7. Pour the meat mixture into the prepared pie crust and bake in oven at 425 degrees for 25 minutes.
8. While your pie is baking prepare the topping. Combine egg, milk, 1/2 tsp. salt, mustard, Worcestershire sauce and cheese.
9. After you've baked your pie mixture for 25 minutes take out of oven and pour the cheese mixture onto pie. 10. Top with crumbled bacon and sliced olives and put back into oven for 5 minutes or until cheese melts. 
11. Remove from the oven and let stand for 10 minutes before serving.
12. Put your fat pants on and refrain from eating the whole pie at one sitting.
Now go to the store, buy the ingredients, and come home and cook! You won't regret it!! Trust me you won't. I'm a VERY picky eater and I even ate my whole piece. Had it not been for us saving the rest for when my granddaddy then I would have eaten a second piece!! Enjoy cooking!!
XOXO, The Gearles 
It's time to get down and dirty in the kitchen because....TODAY IS FOOD FRENZY FRIDAY!!! So what is Food Frenzy Friday? This is the day my mom and I will pick a family recipe or a recipe that we really enjoy and share it with you! We shall include steps, pictures, and tips. Who's ready to start baking?? I know I am!! And so now you're probably wondering what today's recipe is....
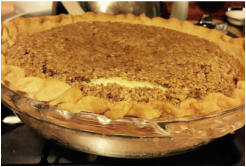
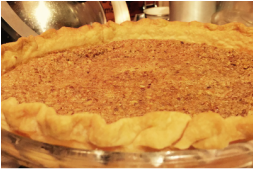
Mystery Pecan Pie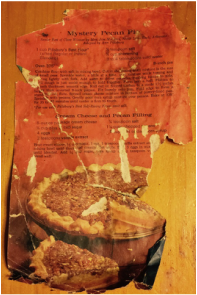
So what's the story behind this pie? Back in the sixties my mom would always buy Pillsbury Cook Off Magazines. She would go through the magazine and pick out recipes to try. Mystery Pecan Pie is one of those recipes that stuck and has become an Earle Family Favorite. Even though my mom is no longer with us her Mystery Pecan Pie lives on. I hope you enjoy it as much as we do!
(The picture to your left is a picture of the original recipe my mom used. As you can tell, it has been used a few times!!)
The pie takes one pie crust. We usually use a store bought pie crust because we are too lazy to make our own but my mom always made her own and it was a FABULOUS recipe! So if you're brave enough and energetic enough to make your own pie crust, here is the recipe she always used. **Note you do not bake the pie crust - it bakes with the pie.
Pie Crust Ingredients:
1 c. flour 1/2 tsp. salt 1/3 c. shortening 3-4 Tbsp. cold water Combine flour and salt in a mixing bowl. Cut in shortening until mixture is the size of small peas. Sprinkle water, a little at a time, over mixture while tossing and stirring lightly with fork. Add water to driest parcels, pushing lumps to side until dough is just moist enough to hold together. Form into a ball. Flatten to 1/2 inch thickness; smooth edges. Roll out on floured surface to a circle 1 1/2 inches larger than an inverted 9 inch pie pan. Fit loosely into pan and gently pat out air pockets. Fold edge to form a standing rim; flute. Cream Cheese and Pecan Filling 
1 (8oz.) pkg. cream cheese
1/3 c. plus 1/4 c. sugar 4 eggs 2 tsp. vanilla extract 1/4 tsp. salt 1 1/4 c. chopped pecans 1 c. light or dark corn syrup 1 (9 inch) pie shell
Step 1: Beat cream cheese, 1/3 cup sugar, 1 egg, 1 teaspoon vanilla. and salt in a small mixing bowl. Mix until thick and creamy. Set aside.
Step 2: Beat 3 eggs in mixing bowl until blended well. Add 1/4 cup sugar, corn syrup, and 1 teaspoon vanilla; blend well.

Step 3: Spread cream cheese mixture in bottom of unbaked pie crust shell.

Step 4: Sprinkle with pecans.
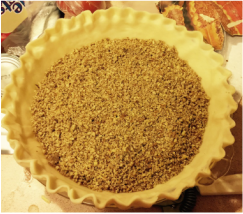
Step 5: Gently pour corn syrup mixture over pecans.

Step 6: Bake at 375 degrees for 35-40 minutes, until center is firm to touch. As a warning the cream cheese filling will puff up causing the pecan layer to crack. However, as the pie cools off, the cream cheese layer will deflate and the pecan layer should then look relatively normal. We recommend that you check it every ten minutes and after the first 10-15 minutes add a pie crust shield. Here's a link to a website that explains how to make your own pie crust shield.
Have you figured out why it's called a mystery pecan pie? (look below the recipe for the answer.)
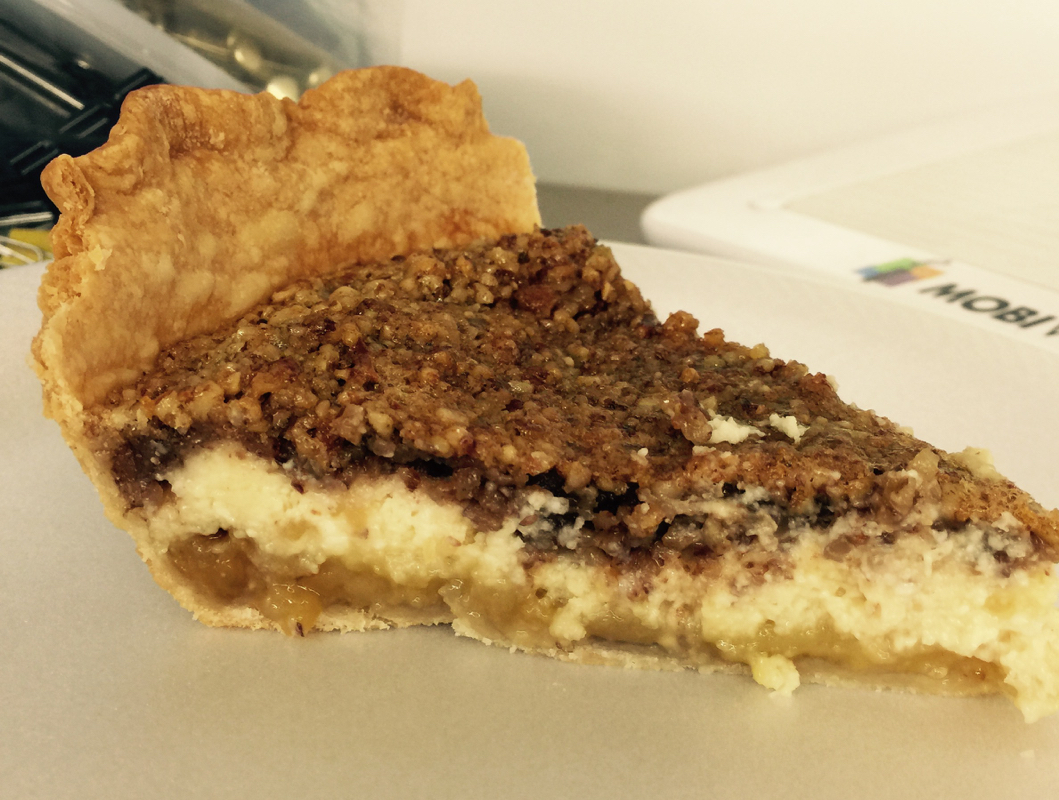
The mystery? Somehow in the cooking process all the layers mysteriously switch places! |

Abby & AndreaA college student trying to figure out the world with her mom by herside. Life through my lens (Abby). We all have different stories and these are only some of mine. Some funny, some adventurous, some hard. Sit back and relax. Enjoy. Archives
March 2018
Categories
All
|


 RSS Feed
